How to Use Item Attachments
The attachments feature in Houzz Pro makes it easy to keep important product documentation, like spec sheets, installation guides, manuals, and warranties, connected directly to the items you're using. Instead of saving product-specific files in a separate location, you can attach them once to a Library item – manually or via the Clipper – and they will stay with that item across every feature where it appears. Attachments are available in My Items, Selections Tracker, Selection Boards and everywhere Item Overviews appear.
Let's take a look at how attachments work with each feature in Houzz Pro.
Attachments in the Clipper
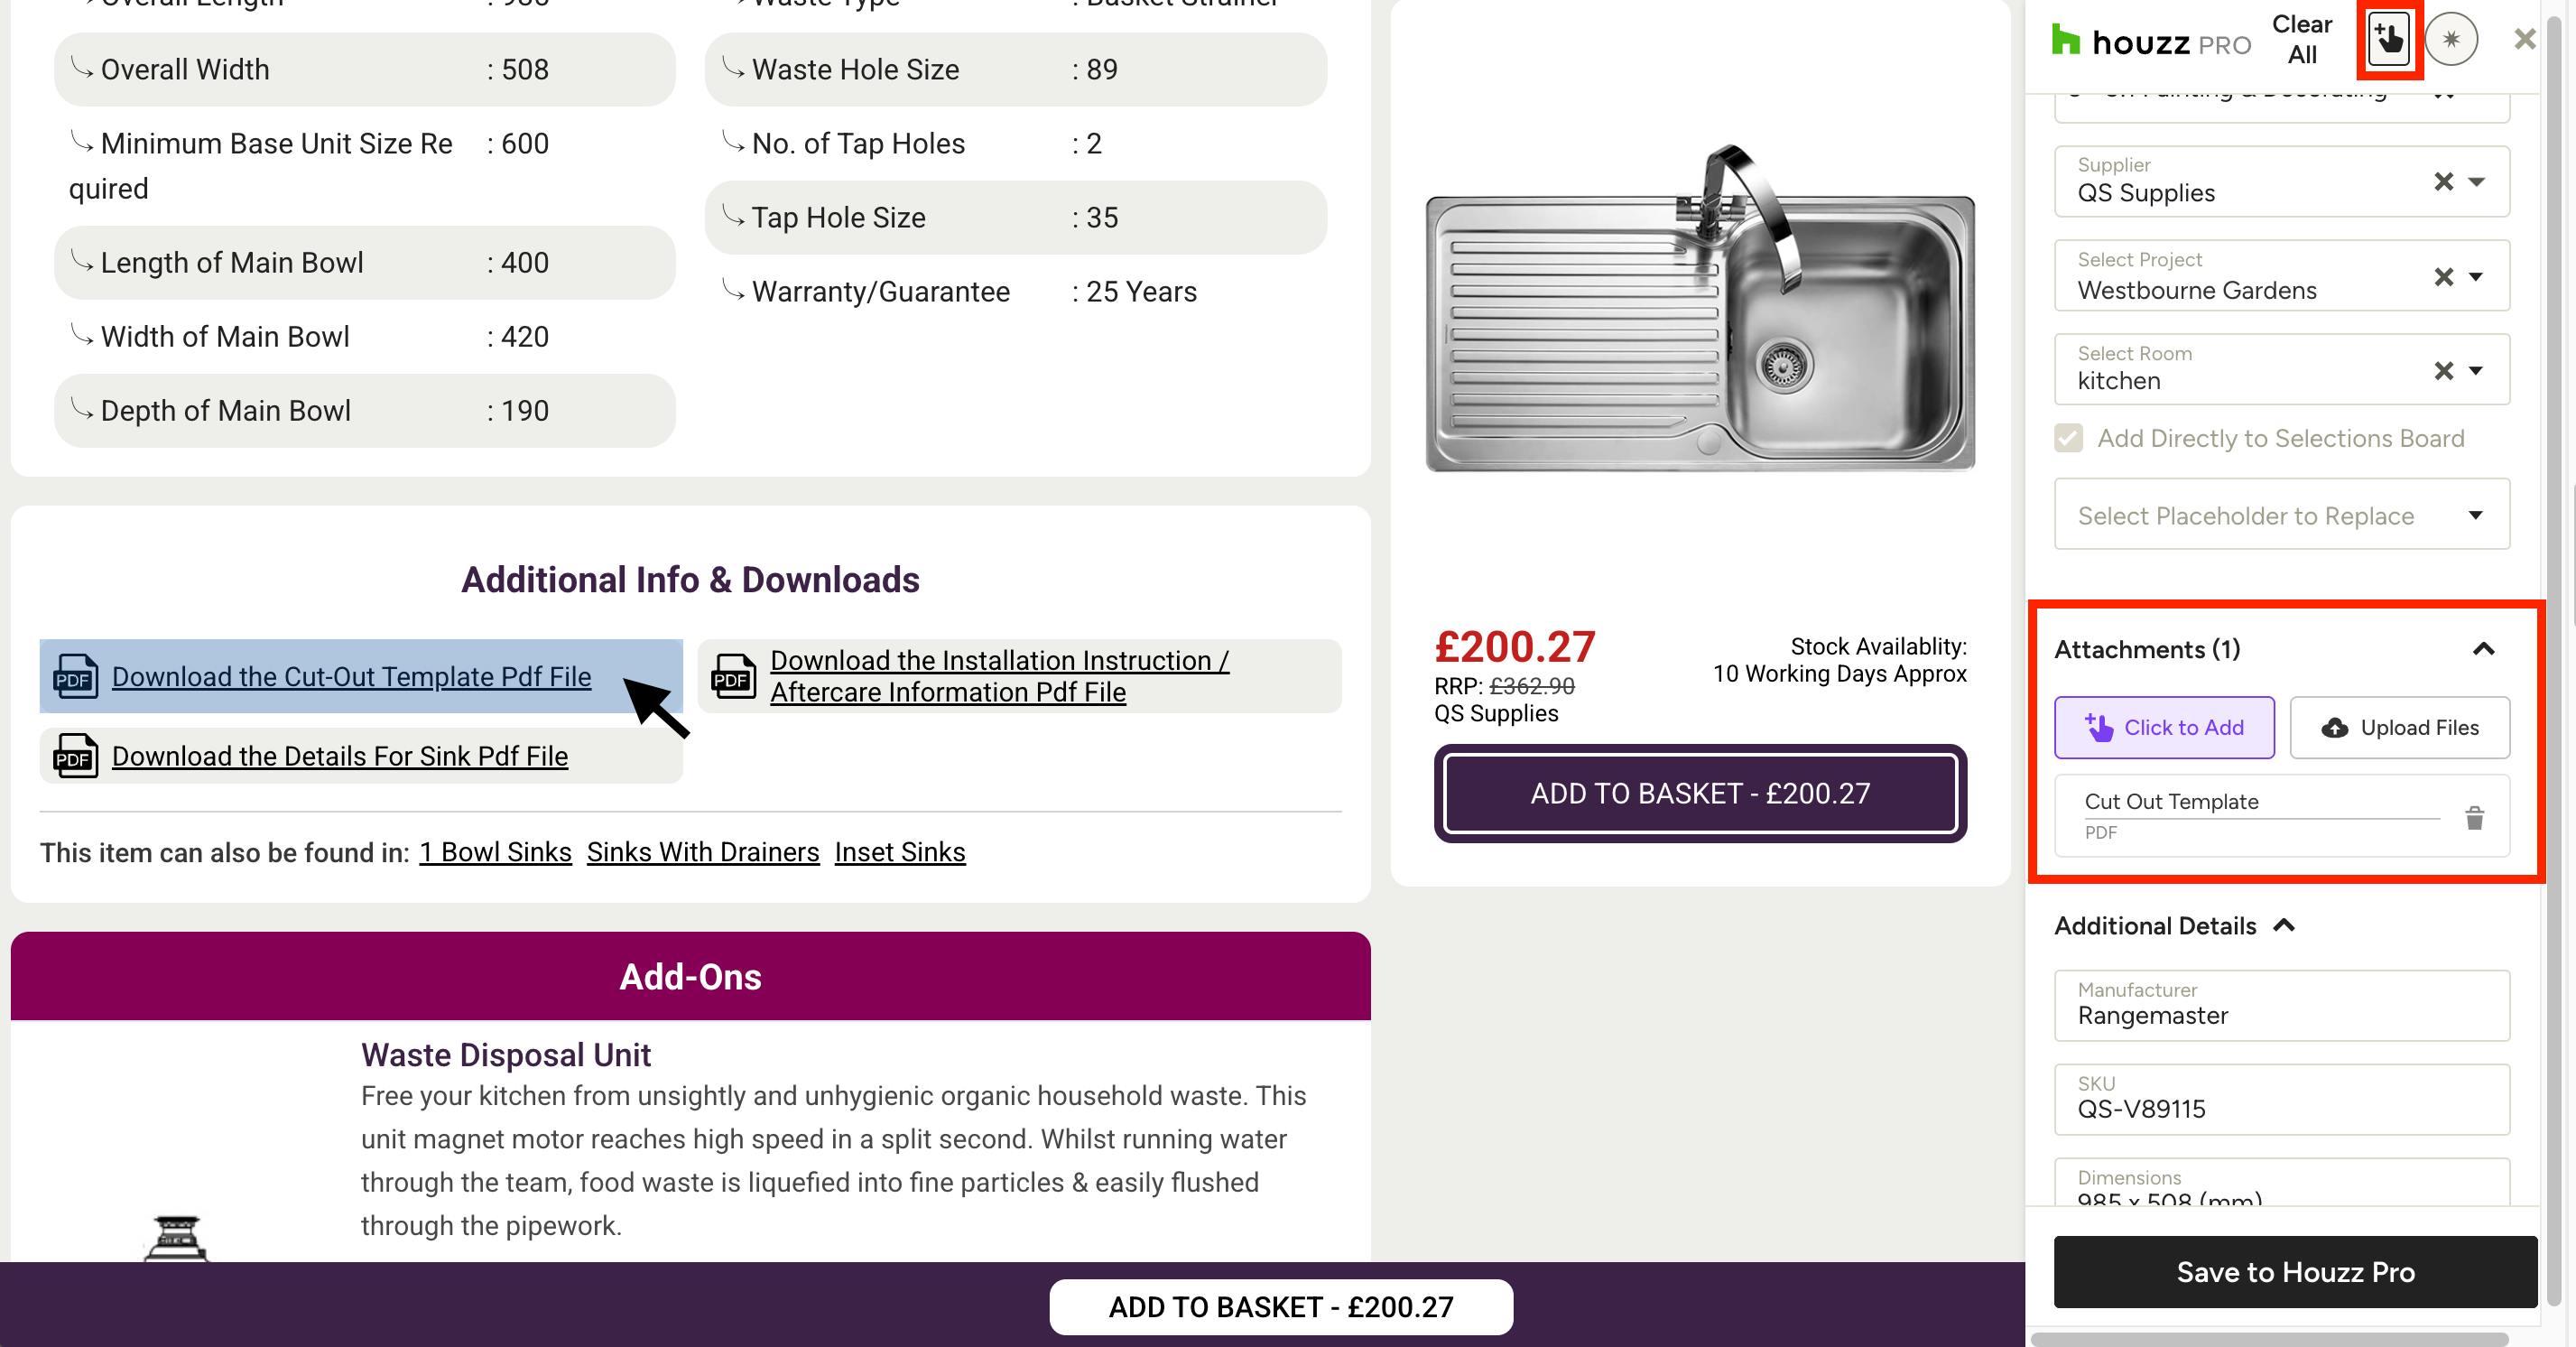
You can start attaching files to a product the moment you clip it, so documentation is captured right alongside the item itself.
While using the Clipper, you can either click the hand tool at the top, or scroll down to the Attachments section and select Click to Add. You can now hover over any file on the page with the hand and click it to instantly add it as an attachment. Once added, you can rename a file by clicking directly on the name, or delete a file using the bin icon.
If you would like to manually attach files while clipping, click Upload Files to choose from your device's local files.
Once clipped, the file(s) will be saved as an attachment on the item in your library (My Items), and will carry over automatically when the item is added to various project features, such as Selection Boards, Selections Tracker, or financial documents.
Attachments in My Items
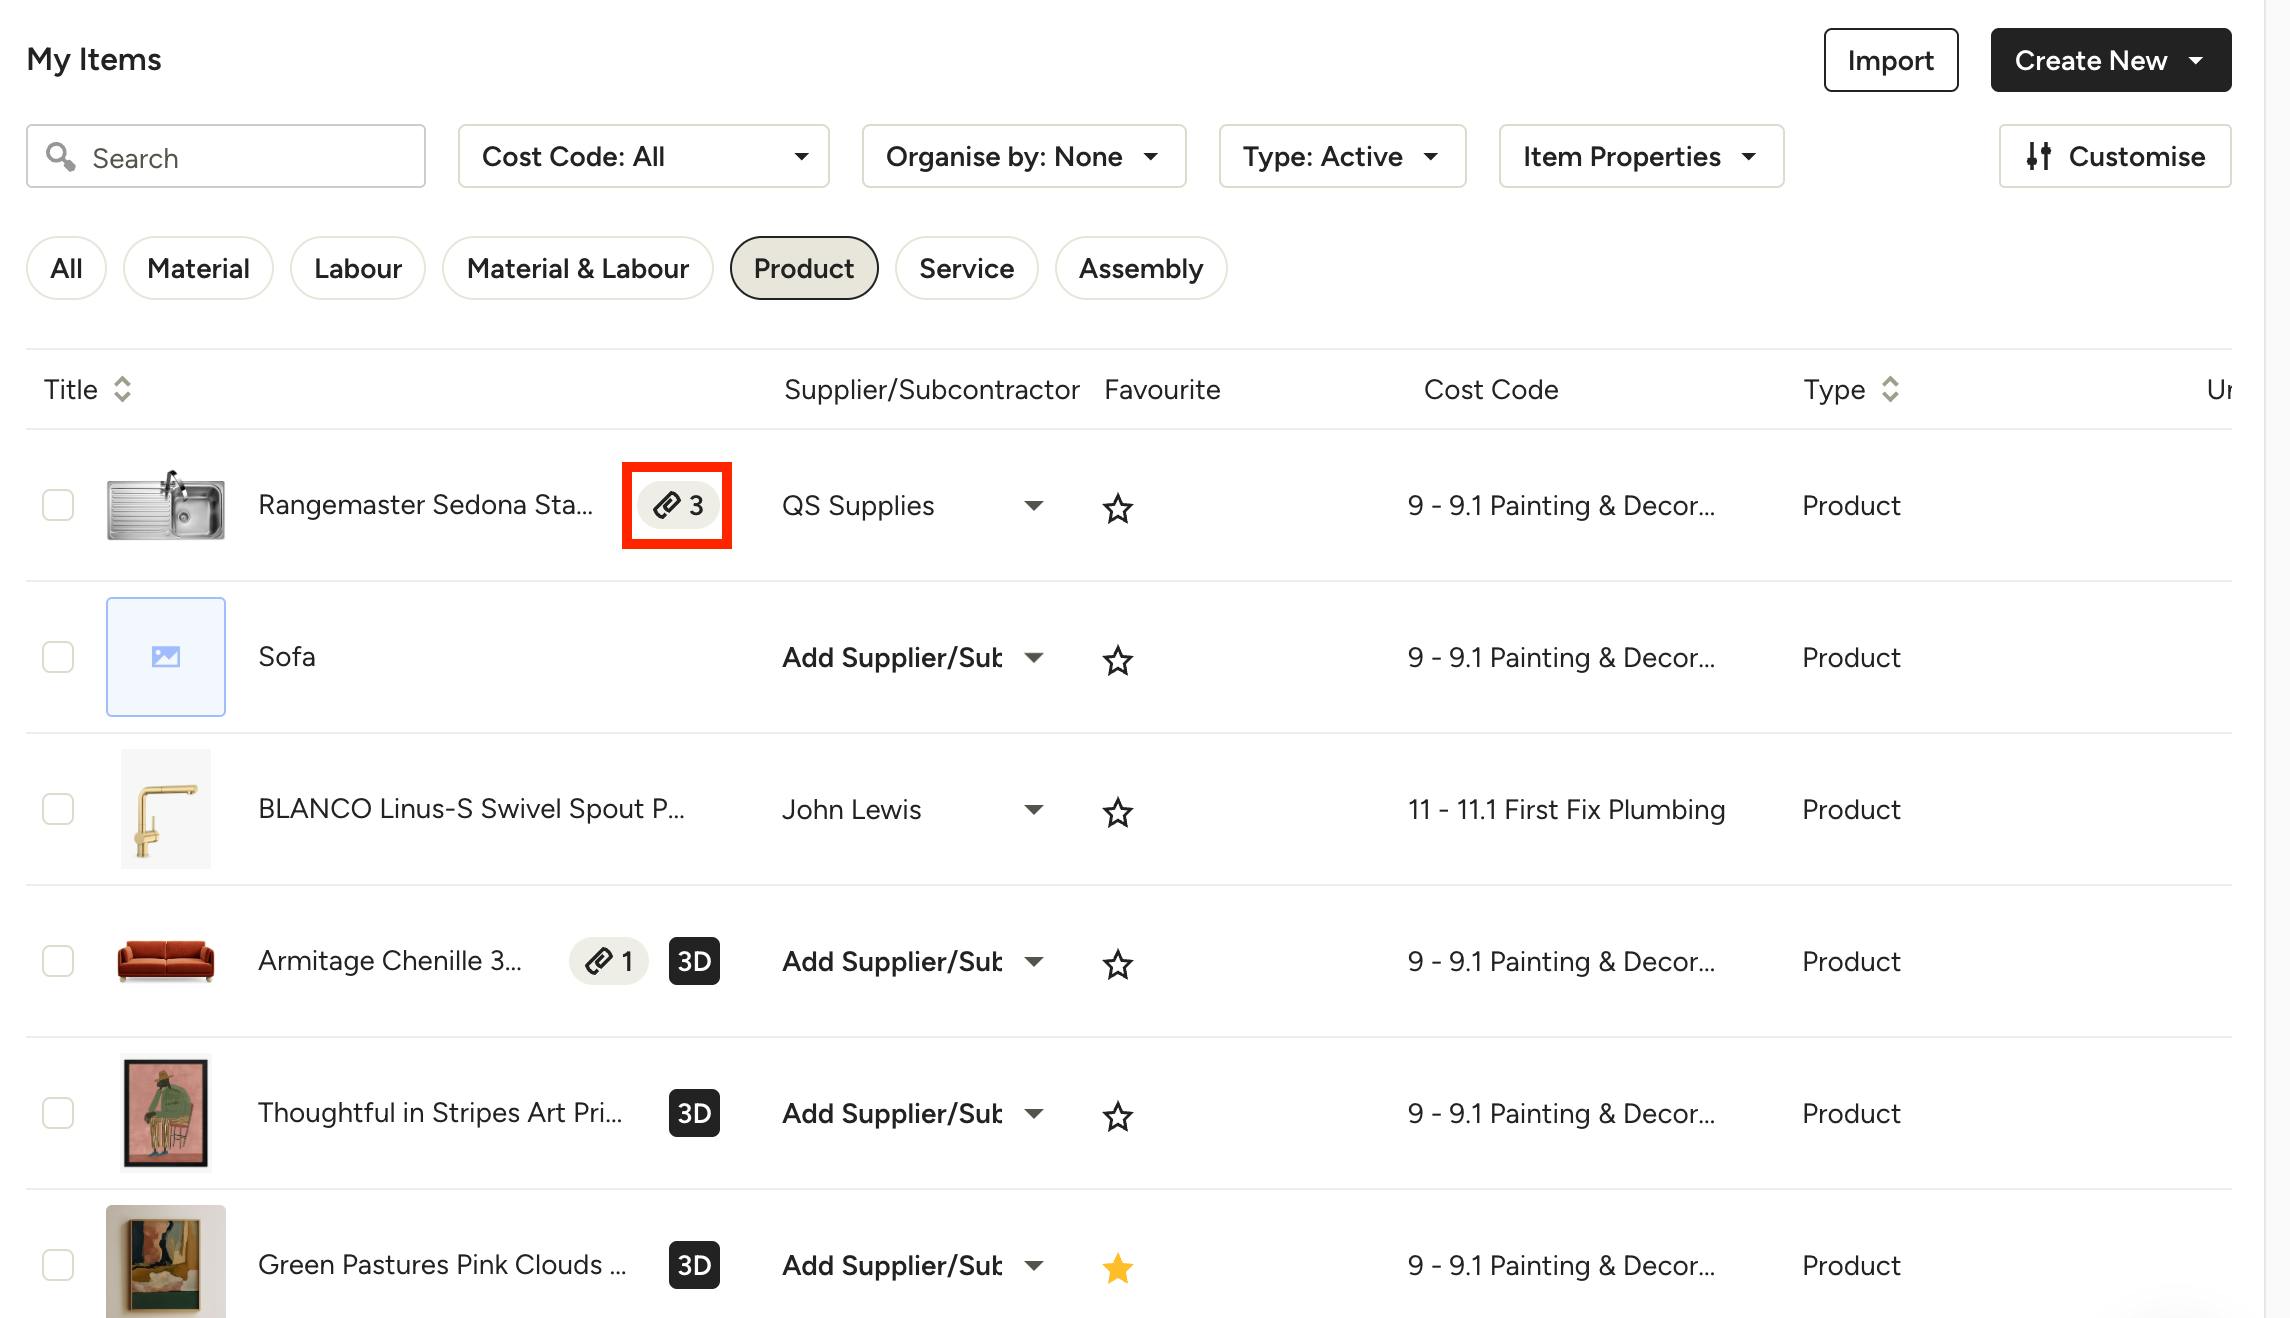
Once an item has been clipped or manually added to your library, you can add attachments, or manage existing ones, from your My Items page.
This is the most central place to keep an item's documentation up to date, since any attachments or changes you make here will be reflected on all future uses of that item.
Note that any changes made in My Items will not update items that have already been added to projects. Existing project items must be updated on their respective documents or selections.
Items with existing attachments in My Items can be identified by an icon with the number of attachments. To view existing files or upload new ones, click on an item to open the editor and scroll to the Attachments section.
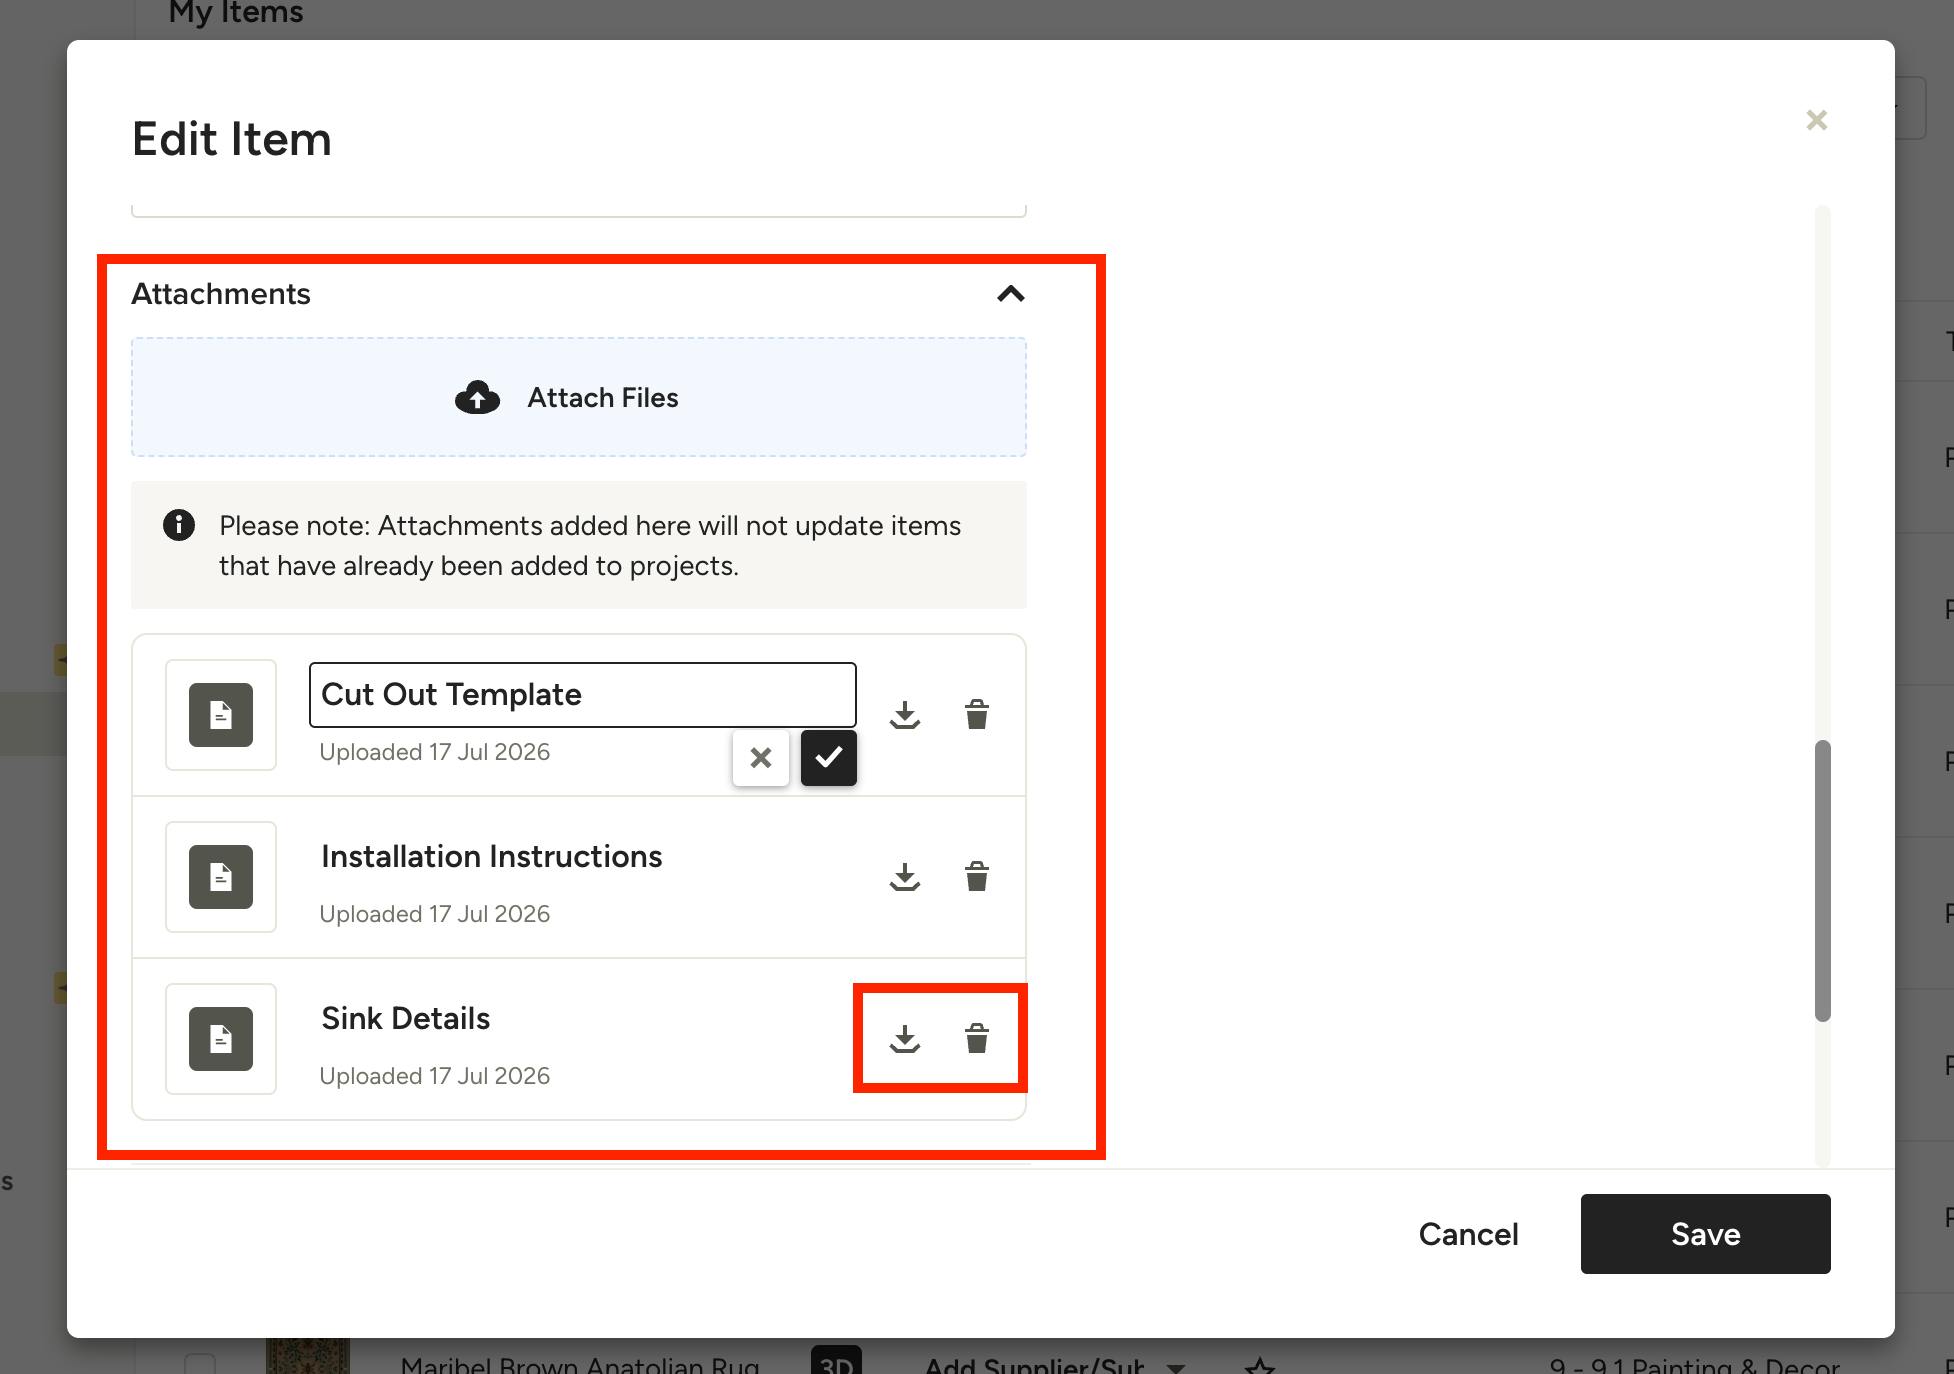
Within the item editor, you can add new files or manage existing ones, including rename, download or delete. To preview an attachment, click the thumbnail on the left.
Attachments in Item Overview
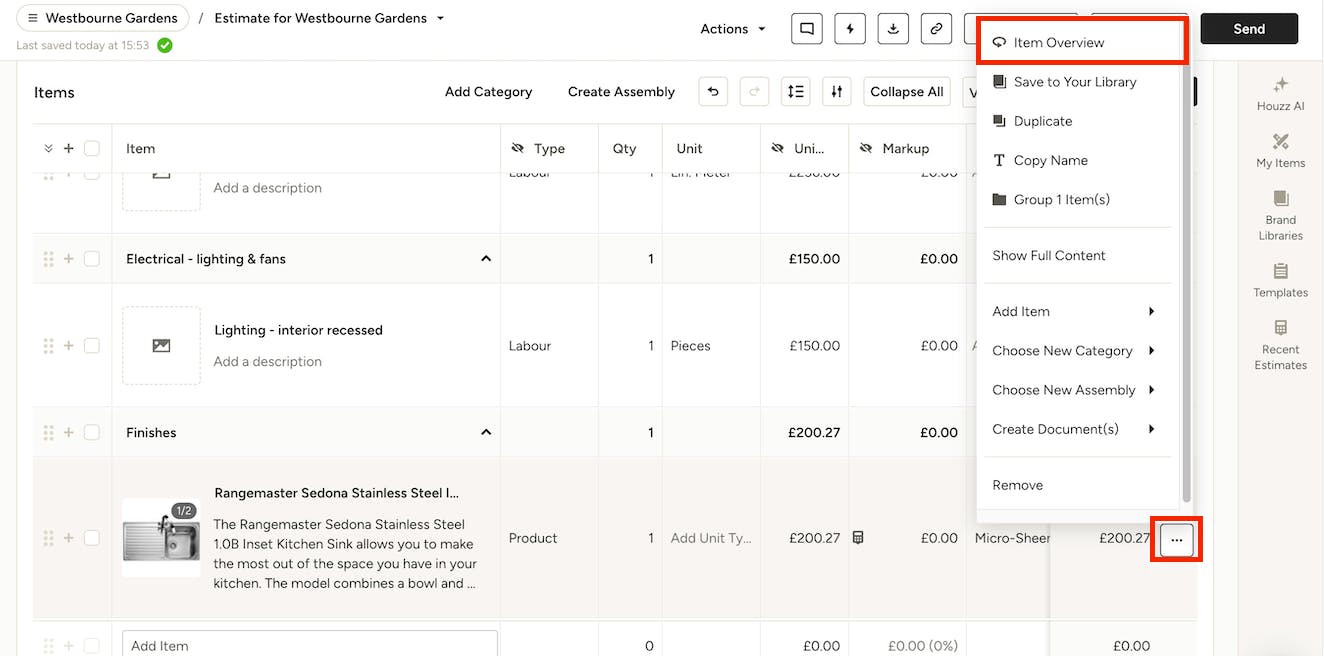
Item Overview is accessible across most features in Houzz Pro, including documents (estimates, proposals, invoices etc), mood boards, selection boards and selections tracker. Look for the i icon, or Item Overview from an options menu (as shown in the document below).
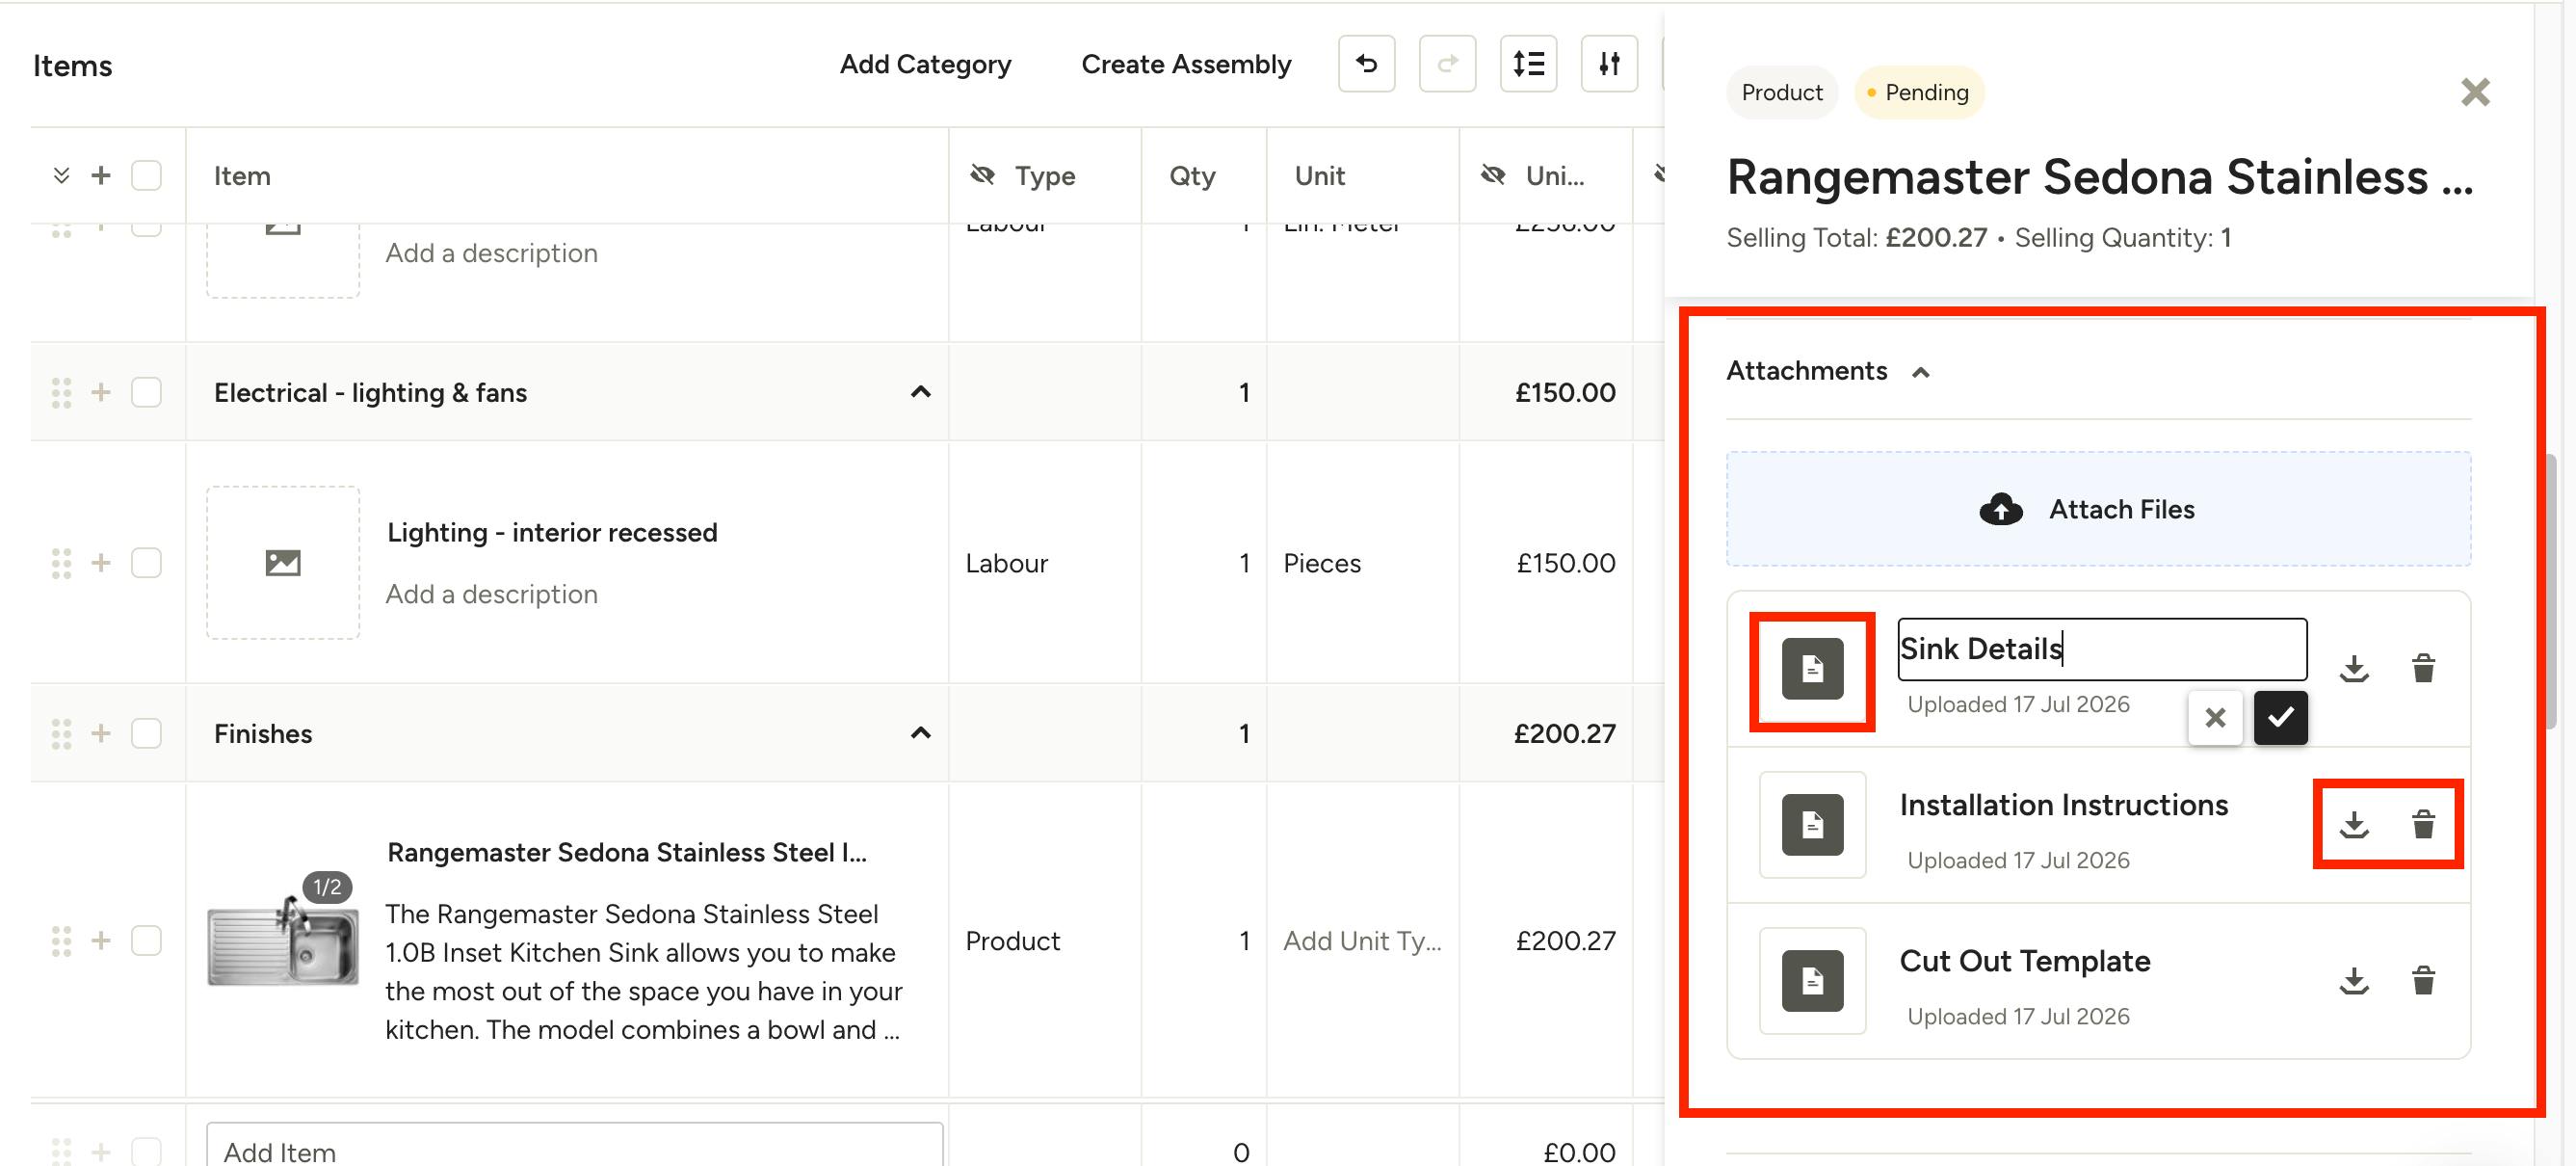
In the Item Overview, scroll to the Attachments section where you can click to view an attachment, as well as rename, download or delete any files. You can also add more attachments.
Changes made to an item's attachments in the Item Overview will reflect across all features within the existing project.
Attachments in Selections Tracker
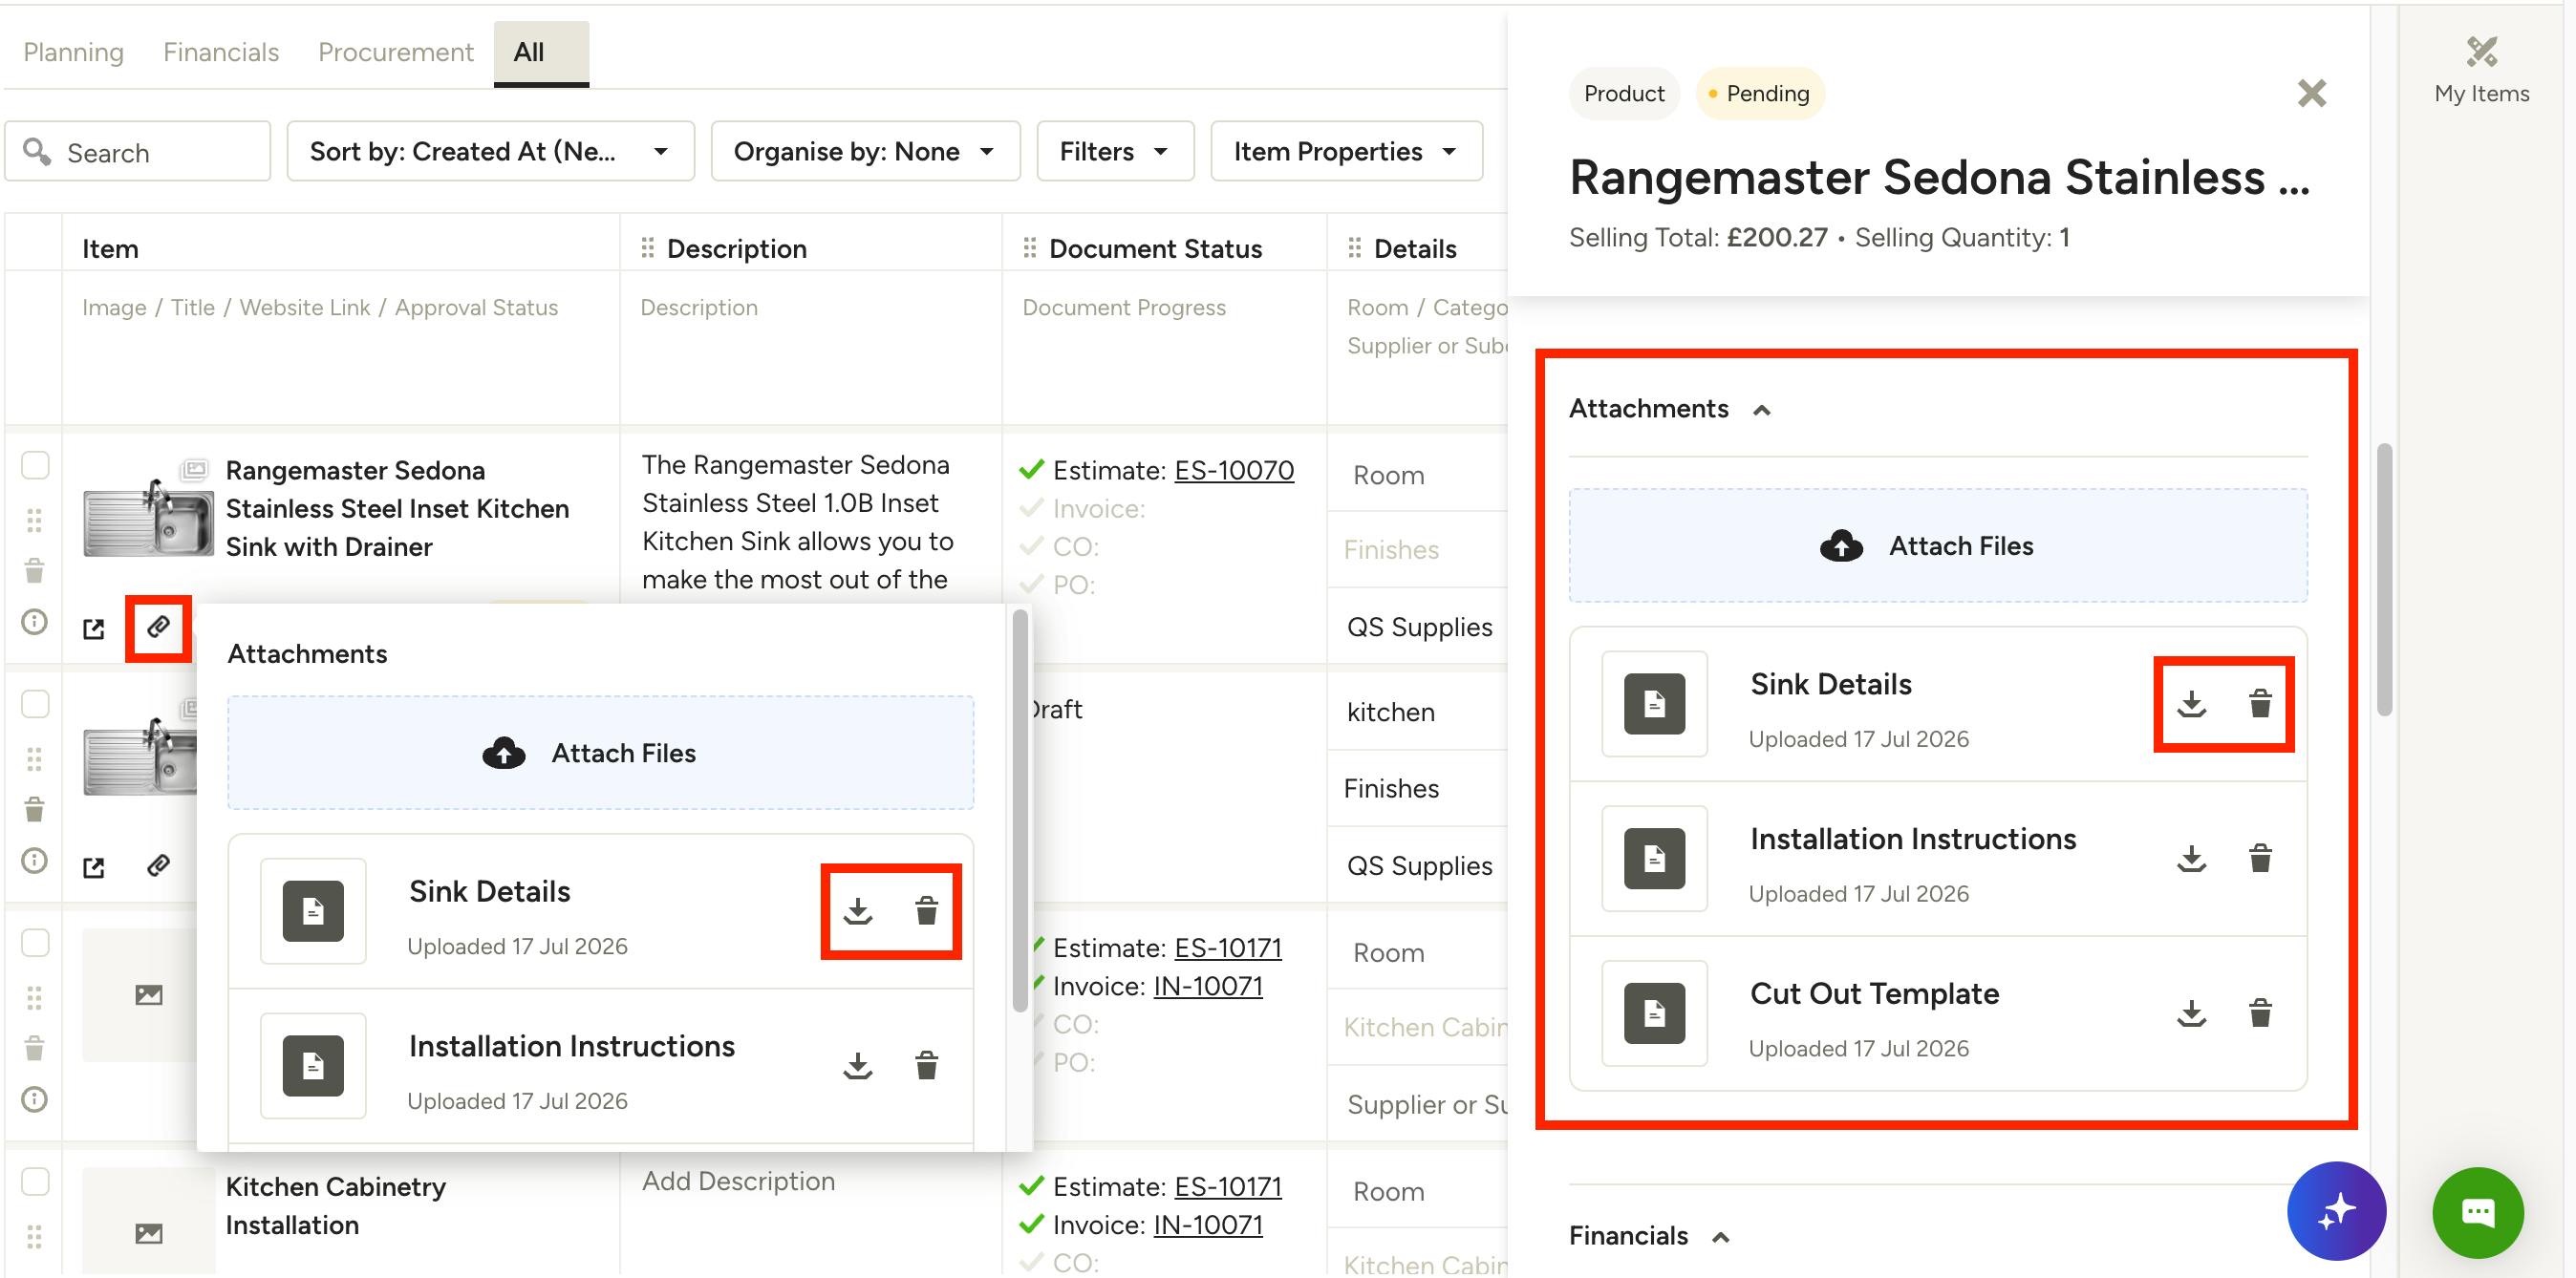
Items in the selections tracker that have one or more attached files will display a visual indicator, making it easy to spot at a glance which products already have documentation on hand.
From the selections tracker, you can manage existing attachments, including previewing, downloading, deleting, renaming, or uploading more files, directly from the item – just click the attachment icon in the Item column.
To attach files to an item in the tracker that doesn't currently have any attachments, open the Item Overview (i icon). Here you can add or manage attachments as mentioned above.
Changes made to an item's attachments in the selections tracker will reflect across all features within the existing project.
Attachments in Selection Boards
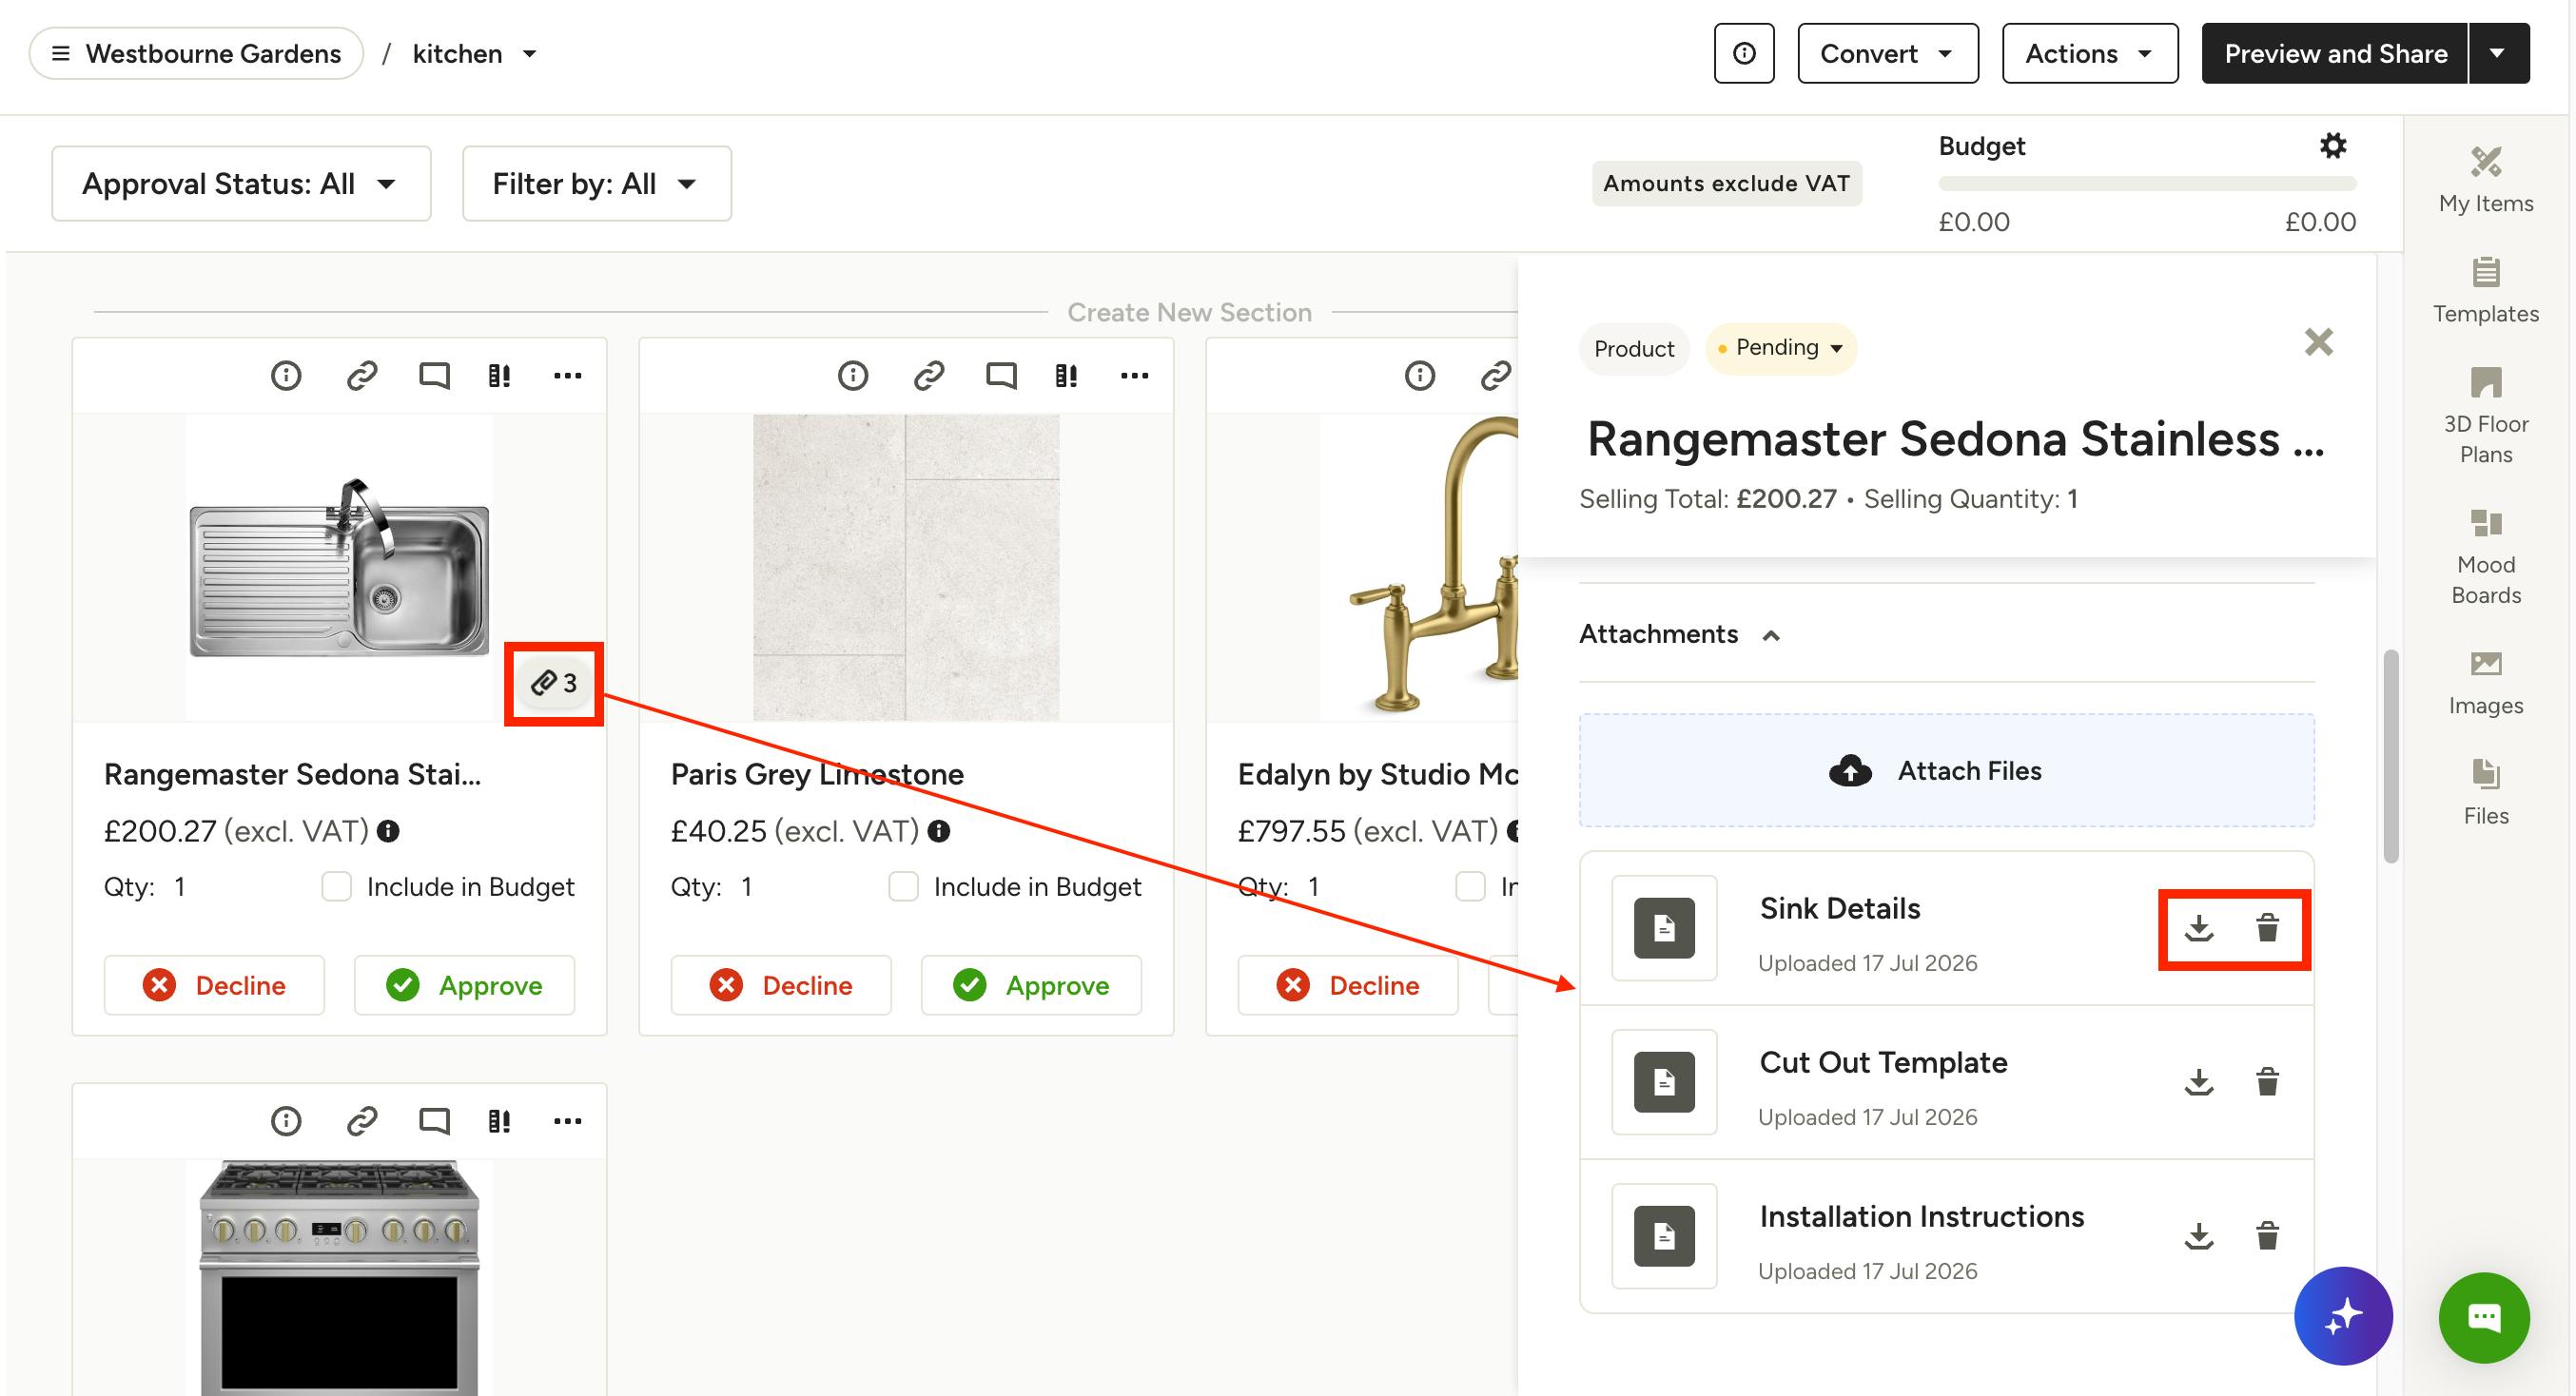
Within selection boards, items that have attachments will show an icon with the number of attachments on the item card. Clicking the icon will open the Item Overview, where you can click to view an attachment, as well as rename, download or delete any files. You can also add more attachments from the Item Overview.
Changes made to an item's attachments in a selections board will reflect across all features within the existing project.
Client Visibility
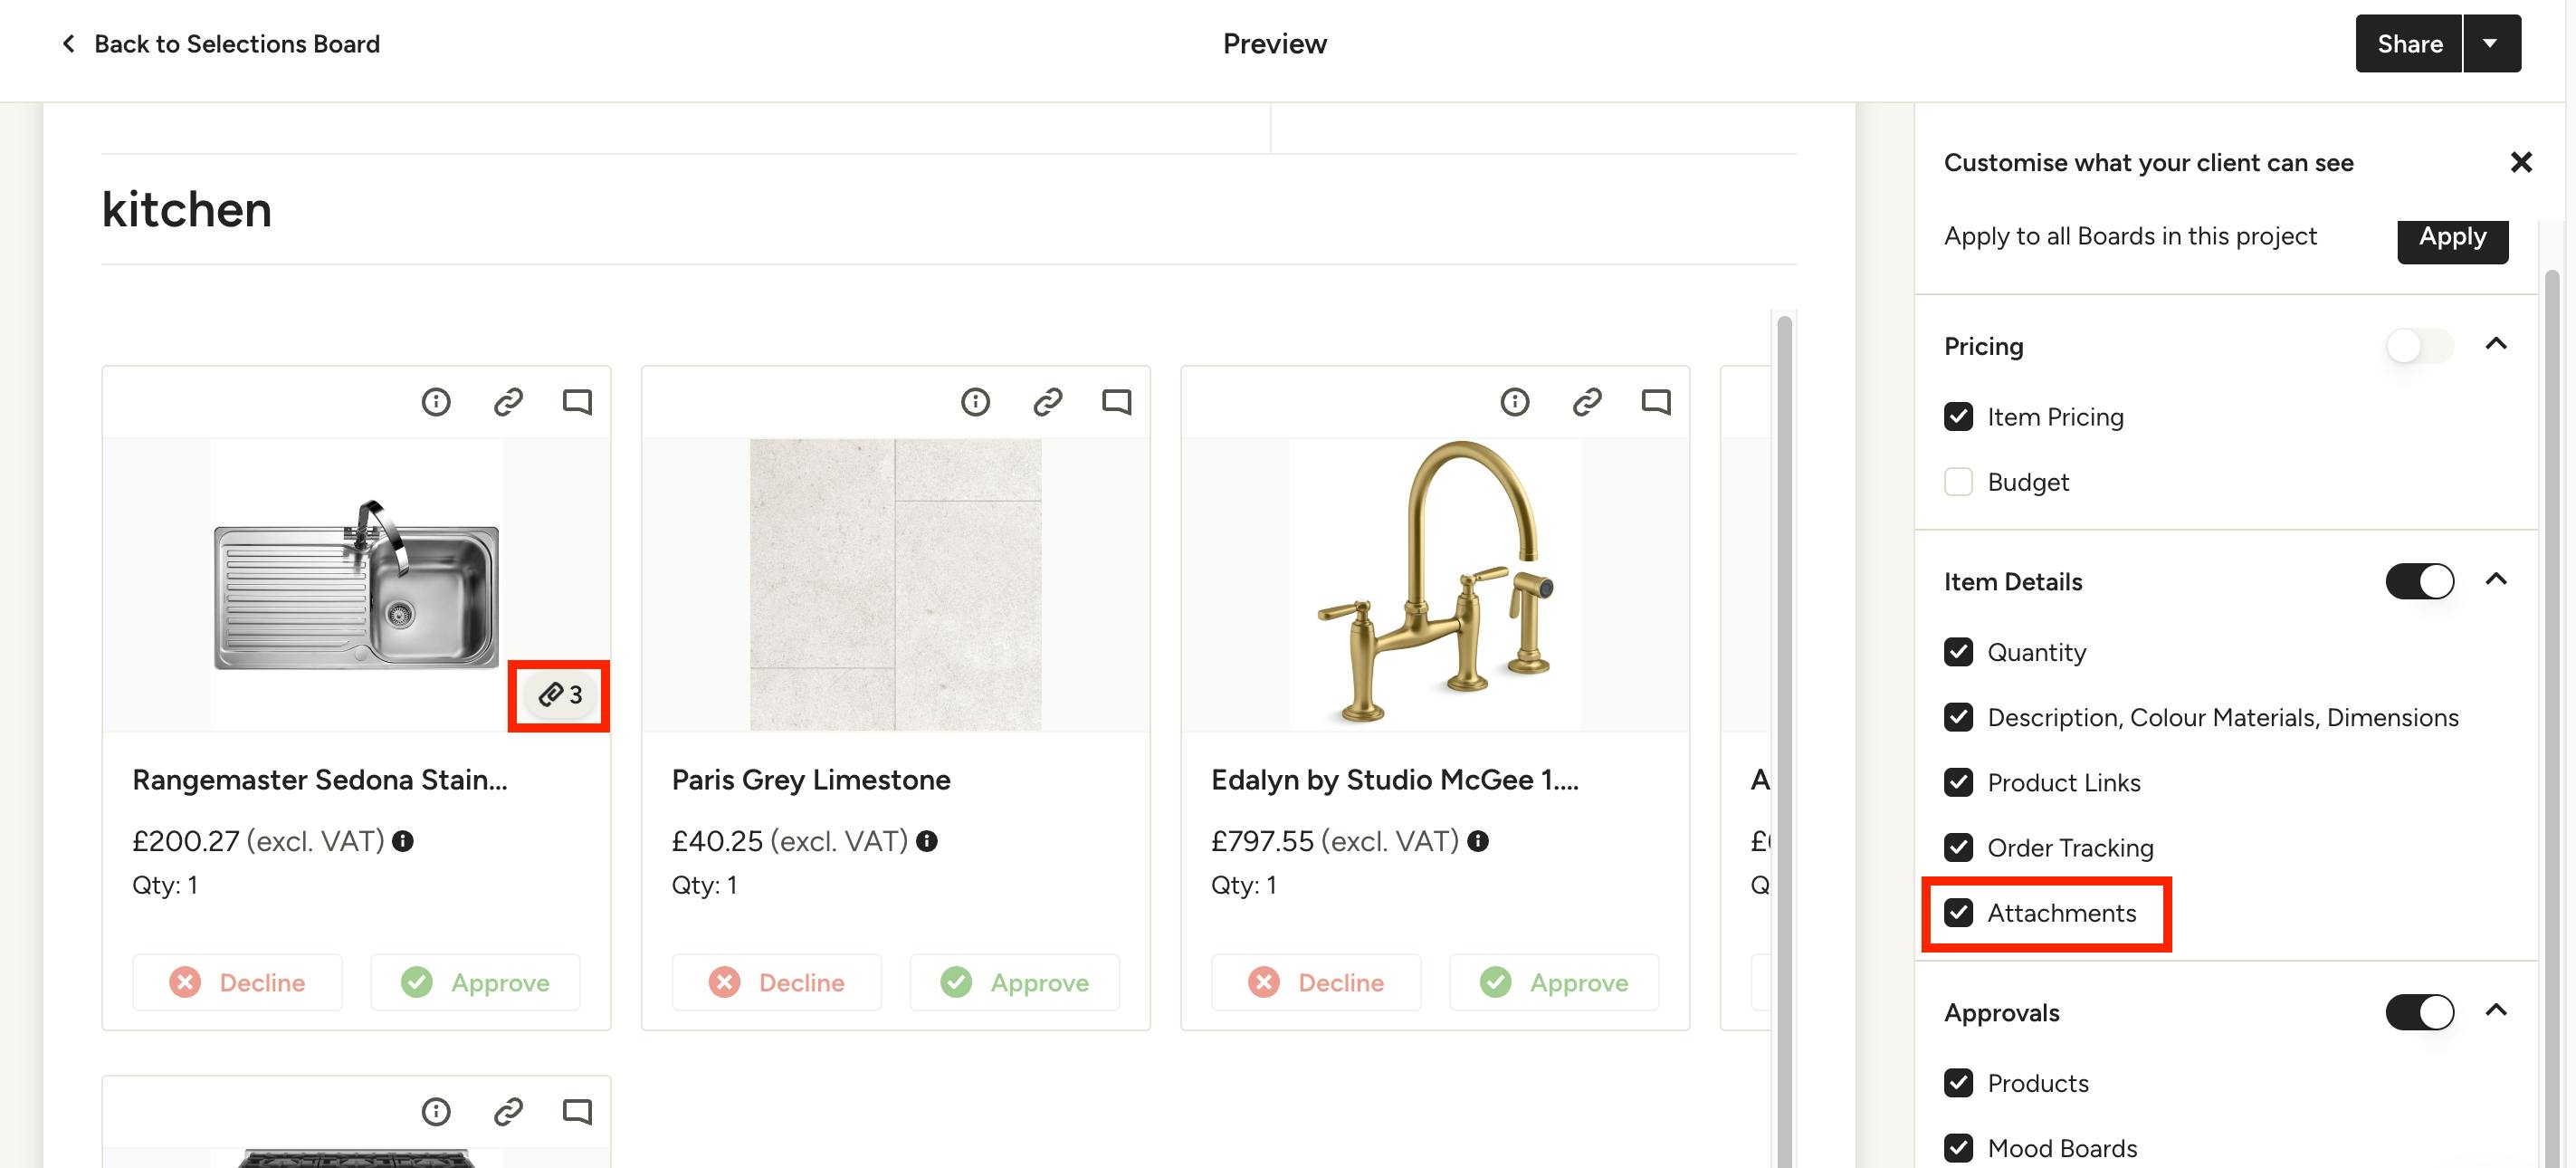
You control whether attachments are visible to clients on selection boards. This gives you flexibility to share helpful resources, like product manuals or warranty information, when it benefits the client, while keeping internal-only files private when needed. To enable or disable attachments for the client, look for the Attachments option under the Item Details section when you click Preview and Share on the board.
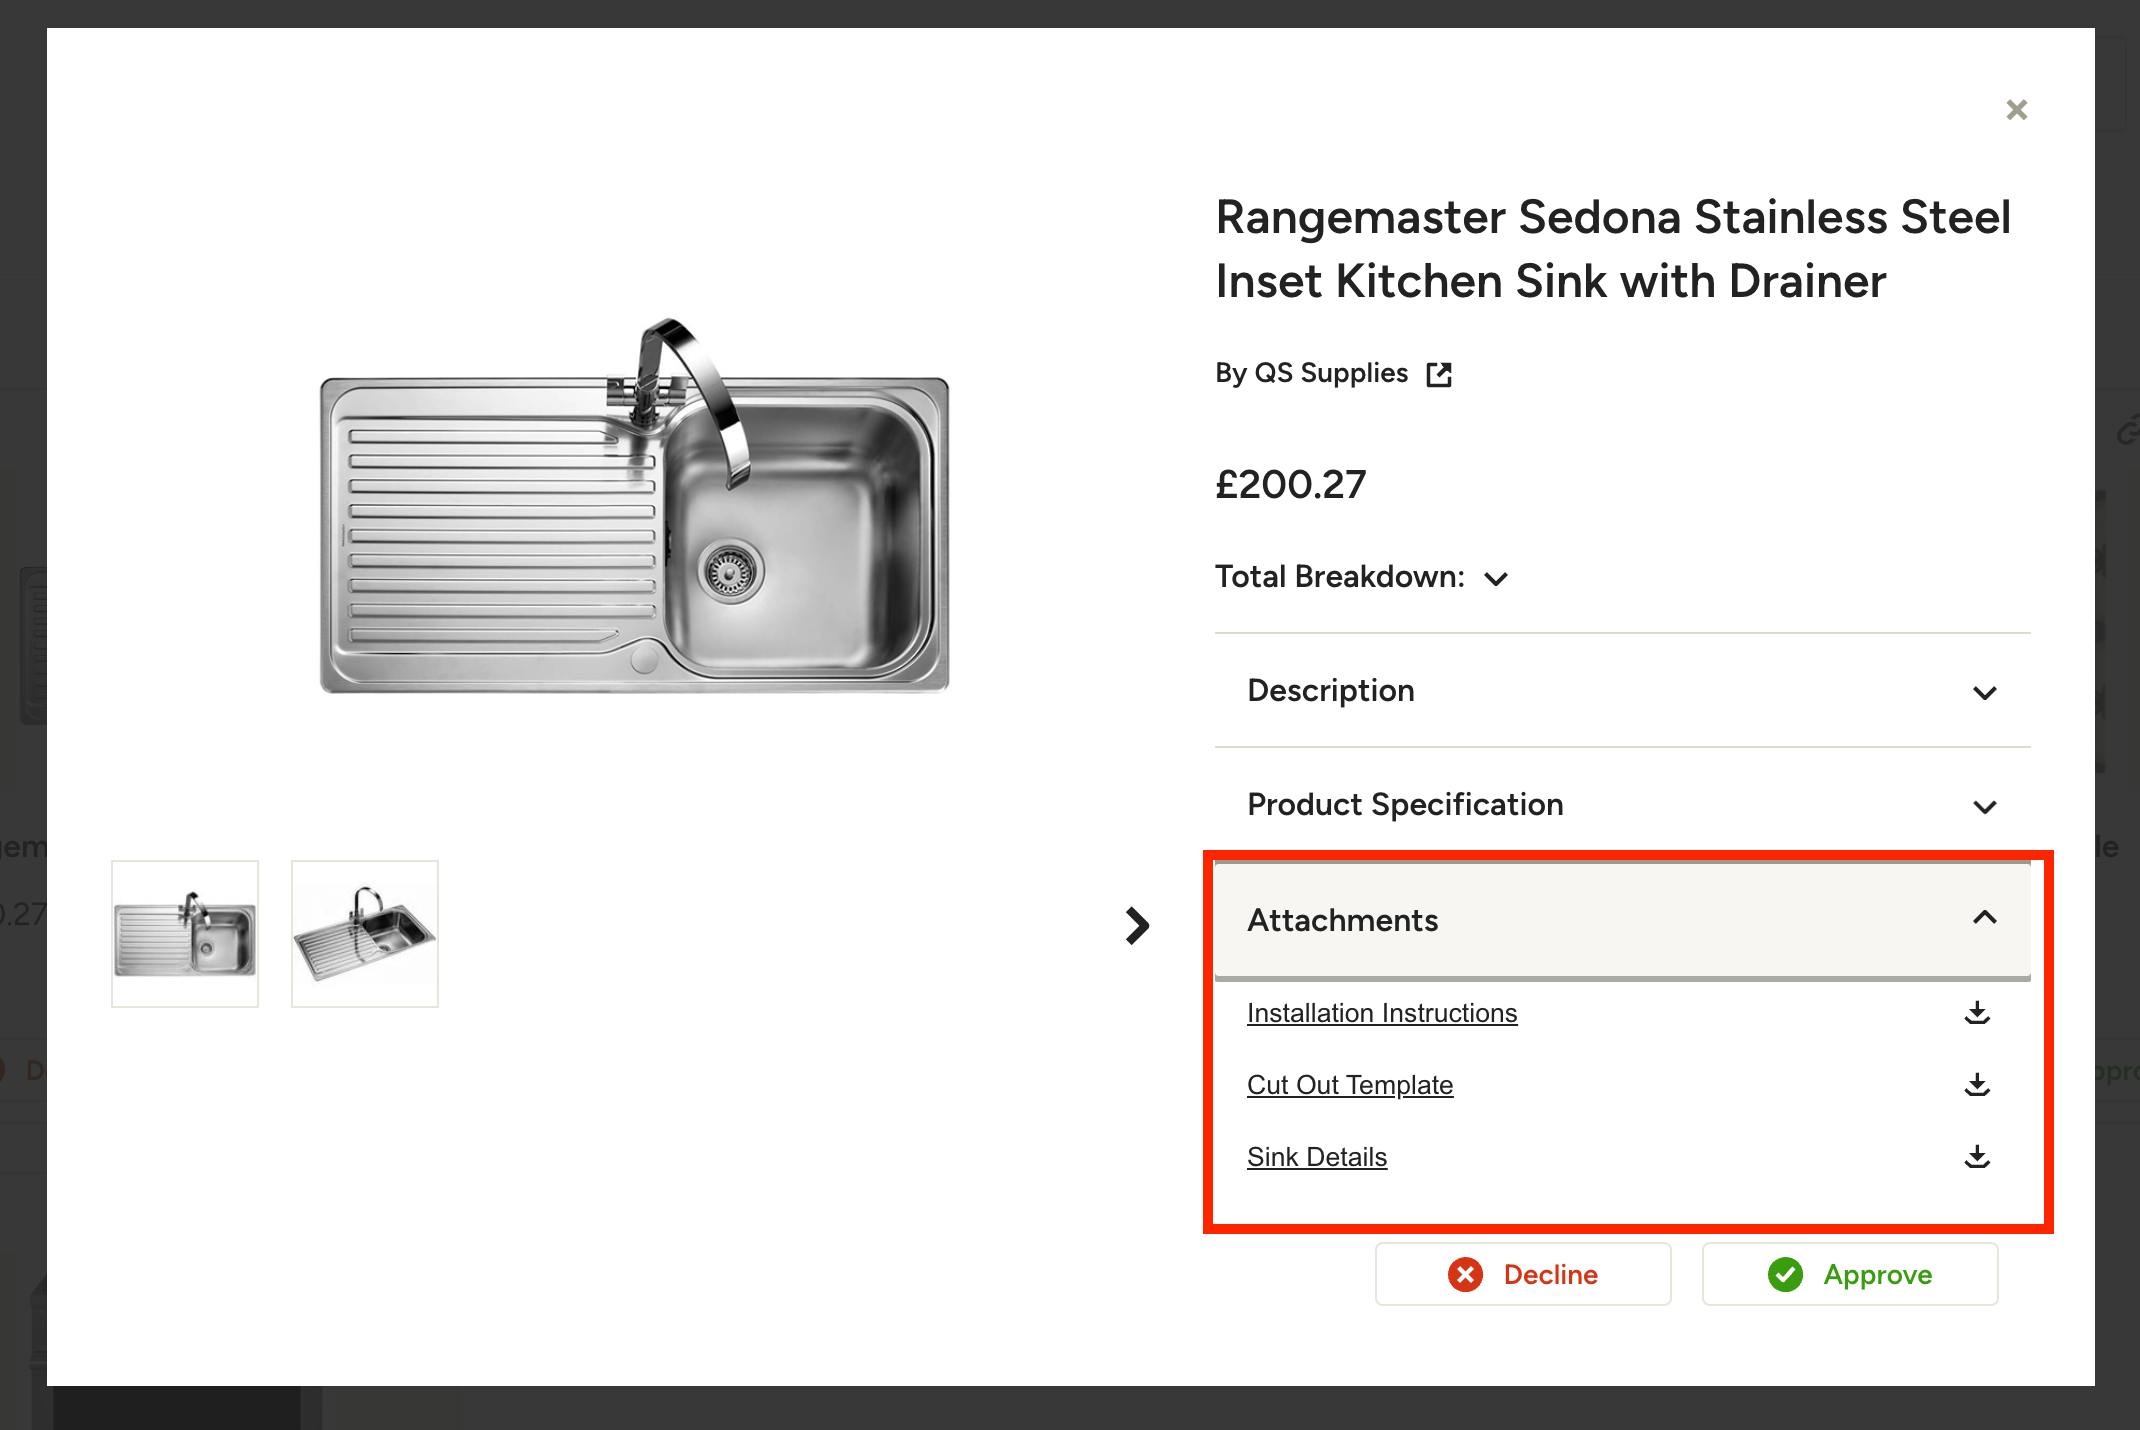
- If enabled, clients will see an attachment icon on the item card, as well as a dedicated Attachments section within the Item Overview when they click into an item. They can view and download the relevant files.
- If disabled, attachments will remain visible only to your team and will not appear to clients viewing the board.